Friday, November 23, 2012

Turkey and Wild Rice Crock Pot Recipe

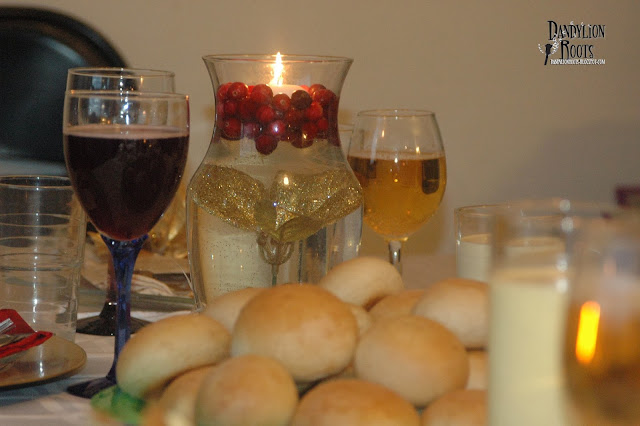
Well, Thanksgiving was fun!  Leftovers are fun too...what to do with all that food?  Well, tonight I tried a new recipe using my leftover turkey.  It was a hit with the hubby and me and the kids choked it down (unless it's straight sugar, they choke down everything I serve...).  The best part?  It took 5 minutes to prepare this morning and the crock pot did all the work during the day and we had a wonderful soup to warm up to!  It took another 5 or 10 minutes to do the last minute stuff in the recipe, but no big deal.  Pair it up with some leftover rolls and some eggnog or sparkling cider and we were all set!  (I paired mine up with leftover Hot Buttered Rum, but let's not split hairs...)

Creamy Turkey and Wild Rice Soup {Crock Pot}
 
Ingredients
  • 4 cups chicken or turkey broth
  • 2 cups water
  • 1 (4.3 oz) pkg. Long Grain Wild Rice (any brand)
  • 1 cup diced or chopped carrots
  • 1 cup diced or chopped celery
  • 1/2 onion diced
  • ½ tsp salt
  • pepper to taste
  • ½ cup flour
  • ¼ cup butter
  • 2 cups milk
  • 2 cups cooked and shredded turkey or chicken
Instructions
  1. In a slow cooker, add the broth, water, rice mix along with seasonings from seasoning packet, carrots, and celery. Stir to combine.
  2. Cook on low for 6-8 hours.
  3. When soup is almost ready, melt the butter in a sauce pan. Add the flour, salt, and pepper, to the butter and whisk together. Cook for a minute or two until the mixture begins to turn golden brown.
  4. Slowly whisk the milk into the flour mixture until smooth and well combined. Stir the mixture into the soup in the slow cooker until well combined.
  5. Add the turkey or chicken to the slow cooker and stir to combine. Cover and cook for 5-10 more minutes until the turkey or chicken is heated through. Serves 8.
Notes
For a broth type soup, you can skip making the cream mixture and just and the turkey or chicken.   Recipe adapted from Real Mom Kitchen.

For my version, I totally forgot to add in the 2 cups water.  Still came out wonderful.  And I accidentally bought beef stock and not turkey or chicken...still was great.  I also cooked mine for only 5 hours since I'm not fond of mushy veggies in my soups (started it at noonish - chopped up veggies and started the cooker after going shopping in the morning with the hubby.  And, unfortunately, it wasn't for Christmas presents...our dishwasher went kaput just before Thanksgiving Dinner started...nice timing, huh?)

All in all, very good.  It made plenty for my family of four, so I will freeze the leftovers and reheat again for another cold night.  Should keep very well in the freezer, even with the milk in it.  Happy Thanksgiving, everyone!

Wednesday, November 21, 2012

Remembering For What We Are Thankful

Last year (2011), I hosted Thanksgiving for the first time.  In years past, we've just celebrated with my parents - even after I was married we spent the day with them (my in-laws got Christmas).  But last year my parents passed on the tradition to my family.  They claimed it was because we just bought our first home and now had the space, but I think secretly they were ready to not have that hassle anymore!  (They still host Christmas Eve).

I am a hostess at heart and jumped at the chance.  I also am not afraid to delegate, so Thanksgiving Dinner became more of a potluck.  I decorated the table, put out matching dishes, and started a new tradition.


I purchased a plain white tablecloth.  On each corner of the cloth, I wrote in Sharpie a Thanksgiving quote from scripture.


After dinner, everyone at the table took another Sharpie and wrote what they were thankful for, signed it, and put the date down (especially the year).


(this is my favorite, of course...)

Once the dishes were cleared, the thankfuls from my family was clear.  This year, in 2012, I will be bringing out this same tablecloth (it's been washed, of course, and the sharpies stayed put) and having my guests sign again.  Won't it be a wonderful problem to have in the future to find an empty spot?  What a great memory to see from year to year!  And to see my children's notes (my eldest's from 2011 is in the top left corner - she took up nearly the entire side there!) will be precious to see as the years go by.  


I know my daughter is really looking forward to this.  She wrote a story about it at school (even without me reminding her of this activity last year - so it must have stuck in her mind!). And then when she asked if we were going to do it again this year, she squealed with excitement when I said yes.  Oh, the joys of a child!

What are your favorite Thanksgiving traditions?

UPDATE: Here are pictures from our 2012 tradition!
The table was a bit longer this year...(more guests!)  But here it is with two years of signatures


Our place settings:


Thursday, November 8, 2012

Rei the Reindeer

I like the whole idea of "Elf on a Shelf".  I have never bought the book or read it, but I see enough photos and blogs about it, I think I have a pretty good idea of the premise.  However, I have not been (ever) gung-ho about Santa.  I don't mind him, but I'm not going to make a huge effort to see him in the mall or to sneak around my kids or go crazy with the Santa decorations.  We do stockings, we play along and tell the girls that Santa lives in the North Pole and comes to everyone on Christmas eve, but we don't get carried away.  I want my kids to remember the REAL reason for Christmas.

But I love the playful attitude of the Elf!  So, how to I merge the two?  How do I make Christmas not all about being on the naughty or nice list and still keep it fun and magical, but focused on Christ?

Then I stumbled upon this blog.  She was facing the same dilemma   But, she had a solution!  And I shamelessly stole her idea, tweaked it a bit, and made it my own.  I took her letter and re-wrote it to better fit our family and the fact that we're not using an Elf, but a Reindeer.  I liked how instead of the Elf "tattling" on the kids to Santa each night (as the book that started it all describes), our Reindeer is learning from OUR children about grace and forgiveness and love.  That's what I love about this gal's idea - turn the Elf on the Shelf into a teaching moment (or moments!).  When Rei the Reindeer does naughty things (albeit, not as naughty as some of the photos I've seen...I don't have time to be that extravagant!), it will be an opportunity for Ash and Em to teach little Rei about right and wrong and grace.  I shared it with the husband and he gave his stamp of approval.  So, come December 1st, we're giving this Elf on the Shelf thing a try, but we're doing it our way and with God and His Son Jesus as the primary focus.

Here's Rei.  His name is from the Bible (it's just a coincidence that it's the first three letters of Reindeer...) and it means "my friend, my companion".  His story - verse - is found in 1 Kings 1:8.

He's cute, isn't he? ;)

And for those of you wondering, here is the letter.

Have a very Merry Christmas and although it's cliche...remember the Reason for the Season!

Friday, October 19, 2012

Paint Chip Wall

Today I finally did one of my pins from Pinterest.  I have a boring white wall in my living room (just haven't gotten around to painting the darn thing) and I thought that this looked like something I could do for little or no cost until the wall could get painted.  Here is the original post:

paint_chip_rainbow.jpg

Once in my trips to WalMart, I ransacked all of their paint chips.  My color scheme in the living room is sage and burgundy and tanish-brown.  So I picked up all of those colors and stored them in a bag.  Two months later....I finally created my own version!  Here is the before and after:


I am pleased with how it turned out.  It was a little hard to create diversity when I just had two sizes of chips to work with - I ended up folding a few of the longer ones to make it fit. I knew if I waited to have more of a collection to choose from, then this project would never happen, so I just went with what I had! But it will do for my purpose and for the time being!  What do you think?

Thursday, September 13, 2012

Cheap-o Date Night

Although this date night was supposed to be cheap, we nearly spent $3000 on it!  But, we're holding off on the SleepNumber Memory Foam bed for a bit more thought, so this night ended up costing us $3 plus a dinner at Olive Garden!

It started like any normal date - go out to dinner with the hubby and enjoy Olive Garden's all-you-can-eat pasta bowl.  I love that promotion!  We split a Pumpkin Cheesecake for dessert, and then waddled out to the nearby mall.  During dinner, we had composed a list of things to do at the mall - and of course we had our trusty cell phone cameras to document all of the fun!  Once we got inside, the only thing that cost us money was the photo booth ($3) and the Starbucks drink also would have been moolah, but our stop at the SleepNumber store caused us to tarry past closing, so we missed out on "Drink out of the same starbucks cup".  Oh well.  Probably better that way!

Here's our compilation:

From top left to right:
Shane riding a coin-operated toy
Danielle on the playground
Shane in too small a shirt
Photo booth strip
If we had a boy, we'd put him in this onesie
An ugly article of clothing
Danielle in a mask (kinda)
In front of a movie poster
Danielle trying on a ring
Shane wearing a headband from Claire's
Danielle playing Xbox
Shane and a big TV


We had a great time and for only spending $3, it was a "do-again"!  What other things could we add to our list for next time?

Sunday, September 2, 2012

Scraping the Bottom of the Barrel

So at the end of August, I ran out of food.  Or, really, ran out of "planned" meals.  I had plenty of food in the house...I just had to get creative with the preparation.  I read an article in a very old "Taste of Home" magazine (2003, I think) with zucchini and although I knew my family would wrinkle their nose at it, I decided to give it a shot.  A quick Google search and I was in business!  Go here for the link.


These two zucchini were given to me (along with two others - four total!).  I put a salad fork next to it so you could see the scale.  These suckers were huge!  I split one in half length-wise and although the recipe didn't say to, I scraped out the seeds in the middle.  (It smelled like pumpkin...made me want to start brewing some apple cider!).  Then I mixed up the sausage mixture and spread it on the inside of the zucchini.  I baked it as described, although I had to cook it longer than the recipe said and it still was a bit "crunchy" once I took it out.  I also did not have mozzarella cheese in the house, so I sprinkled on the cheddar!


Here's my Sausage-Topped Zucchini in all it's glory!  My husband wrinkled his lip when I first told him what was for dinner, but he ate every last bite of his portion!  He said it "wasn't that bad".  I think it may have tasted better if the zucchini was a little more mushy.  I had it for leftovers and it was still just as good (our family of four only ate one half of this!).  The kid's verdict was what I expected, but they did eat the sausage mixture, although my oldest which must have been switched at birth balked at the cheese.  She hates melted cheese in general (WHAT IS WRONG WITH HER????).  My youngest gave up eating it only because Big Sister declared she was done!

SAUSAGE-TOPPED ZUCCHINI

Ingredients

  • 1/2 pound bulk spicy pork sausage
  • 1 large onion, chopped
  • 1/2 medium green pepper, chopped
  • 1 garlic clove, minced
  • 1 tablespoon olive oil
  • 1 tablespoon butter
  • 1/4 cup grated Parmesan cheese
  • 1 cup spaghetti sauce, divided
  • 2 medium zucchini, cut in half lengthwise
  • 1/4 pound sliced mozzarella cheese

Directions

  • In a skillet, cook sausage until no longer pink; drain. Remove sausage and set aside. In the same skillet, saute onion, green pepper and garlic in oil and butter until tender. Stir in sausage, Parmesan cheese and 1/2 cup spaghetti sauce.
  • Place the zucchini halves cut side up in a greased 8-in. square baking dish. Spread with sausage mixture. Cover and bake at 350° for 35-40 minutes or until tender. Top with cheese and remaining spaghetti sauce. Bake, uncovered, for 5 minutes or until cheese is melted. Yield: 2 servings. (2 servings my foot...this thing could have fed 10 people)


For dessert, I scrounged around in my pantry again and found some boxes of pudding.  Whipped those bad boys up and found a buried package of graham crackers.  While the pudding was firming up, I crushed the crackers into bits and then began my layering process.  Graham crackers, vanilla pudding, chocolate pudding, crackers, vanilla, chocolate, crackers.  Put them in my fancy "margarita" glasses only because I wanted to show off the layers! :)

So I was nervous on Sunday of last week knowing we had to make it until Friday before I could go shopping, and I managed to make it all the way through!  My pantry was gutted and my freezer was inventoried and my family was fed - which was really the point!  Here's to the scraping the bottom of the barrel!

Saturday, August 4, 2012

Garlic Bread Pizza

Today we had a homemade version of Pizza Hut's "Garlic Bread Pizza".  I've never actually had their version, so I didn't really know how they did theirs...I just took the title and ran with it.  I didn't take many pictures either of it (as we no longer have a camera of our own...except cell phones!), so I don't have pics of the ingredients or all the steps.  But seriously, you can figure this one out!

Here it is before I put it in the oven:  (the peanut butter was NOT a part of the recipe...)

And here it is after cooking for 20ish minutes on our table!
(besides being crispier and with melted cheese, it doesn't look much different, huh? :D)

I told my family to be critical of it (hubby asked tentatively, "So, if we don't like it...how would you like us to break it to you?"  Can you tell he's been attacked with how he tells me when he doesn't like one of my creations? :P).  I wanted honest feedback on this one - Is it a keeper?  Too garlicky?  Not garlicky enough? Not cheesy enough? 

So the verdict is........................it's a keeper!  Again, we had nothing to compare it with as we have not had Pizza Hut's version.  Shane just suggested more garlic (whereas older daughter said it's too garlicky...ah, to each his own!).  I thought maybe to go with better quality pepperoni as this one was very salty.  Well, with a bit of tweaking, we'll probably have this again!

Here's the recipe:

GARLIC BREAD PIZZA

1 loaf of french bread from store bakery
garlic butter (made mine from scratch.  Mixed probably about 1/2 cup of margarine and 1/4 cup store-bought garlic diced and 1/2 teaspoon pizza seasoning)
Mozzarella cheese
pepperoni

Cut french bread in thick slices and slather with garlic butter.  Arrange bread slices on cookie sheet or pan and sprinkle generously with shredded mozzeralla cheese.  Layer on the pepperoni slices and sprinkle a bit more cheese on top.  Bake at 350 for 15-20 minutes or until cheese is melted and bread edges are crispy.  Serve with a crisp salad for a meal or have as a snack!